Contents
Introduction to CapCut and Background Removal
CapCut has rapidly emerged as a beacon of creativity in the realm of mobile video editing, particularly for Android users. Originating as a powerful yet user-friendly application, it has garnered widespread acclaim for its comprehensive suite of editing tools, intuitive interface, and, most notably, its zero-cost accessibility. What sets CapCut apart is not just its ability to perform standard editing tasks with finesse but its array of advanced features, tailored to empower even novice users to produce professional-quality videos. Among these features, the background removal tool stands out, offering a gateway to imaginative possibilities previously confined to high-end editing software.

The significance of background removal in video editing cannot be overstated. This feature transcends the basic concept of editing; it’s a transformative tool that allows storytellers to craft visually compelling narratives by isolating subjects and creating new, imaginative backdrops. In a world where content is king, the ability to seamlessly remove and replace video backgrounds opens up a realm of creative freedom. It enables creators to place their subjects in any scenario, real or imagined, thus elevating the storytelling aspect of their videos. Whether it’s for creating engaging social media content, professional presentations, or just for fun, mastering the art of background removal in CapCut can be a game-changer for any aspiring video editor.
CapCut’s approach to this advanced feature is notably user-centric, balancing sophistication with simplicity. This ensures that even those new to video editing can navigate the process of background removal with ease, making professional-looking edits not just a possibility but a readily achievable reality. In the following sections, we’ll dive into the specifics of how to effectively utilize CapCut’s background removal tool, ensuring your videos stand out in the ever-expanding sea of digital content.
Preparing Your Video for Editing in CapCut
Embarking on your background removal journey in CapCut begins with two crucial steps: selecting the right video and setting up the app for a smooth editing experience. Here’s how to get started:
Choosing the Right Video:
- Lighting and Contrast: Look for videos where the subject is well-lit and contrasts clearly with the background. This distinction makes background removal more accurate.
- Stable Footage: Opt for clips with minimal camera movement. Stability ensures consistency during the removal process.
- Simple Backgrounds: While CapCut is powerful, starting with simpler backgrounds can yield cleaner results for beginners.
- High Resolution: Higher quality videos provide more detail, making the background removal process more precise.
Initial Setup in the CapCut App:
- Download and Install: Ensure you have the latest version of CapCut installed on your Android device from the Google Play Store.
- Open CapCut and Create a New Project: Tap on ‘New Project’ to start and grant the necessary permissions for the app to access your media.
- Import Your Selected Video: Choose the video you’ve selected from your gallery to import into your CapCut project.
- Familiarize with the Interface: Before diving into editing, take a moment to explore the CapCut interface to locate key tools and features.
By carefully selecting your video and setting up CapCut correctly, you pave the way for a smoother and more effective background removal process. These initial steps are essential in ensuring that the rest of your editing journey is as seamless and productive as possible.
Step-by-Step Guide to Removing Background in CapCut
Removing the background in your video using CapCut involves a series of straightforward steps. Here’s a detailed guide to help you navigate through the process effectively:
Accessing the Background Removal Tool:
- Open your project in CapCut.
- Select the clip from your timeline where you want to remove the background.
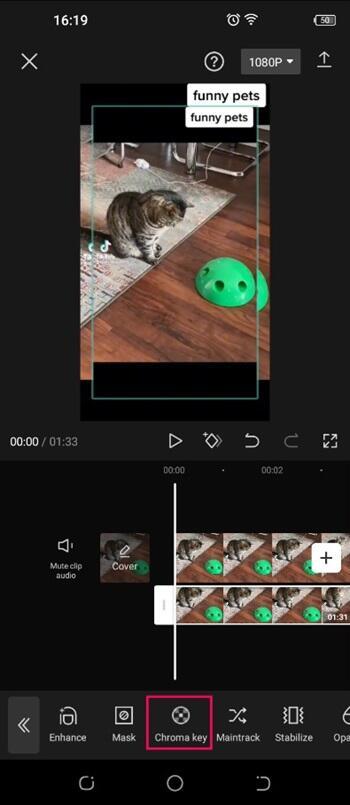
- Tap on the ‘Effects’ icon, usually found at the bottom of the screen.
- Scroll through the effects until you find the ‘Background Remover’ tool and select it.

Detailed Steps for Background Removal:
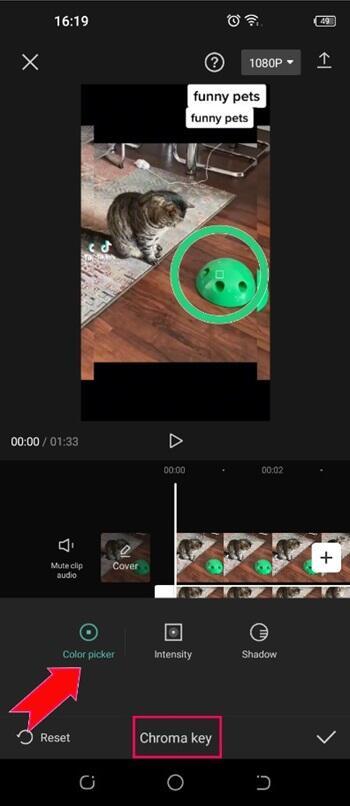
- Once the background remover is active, CapCut will automatically attempt to detect and isolate the main subject in your video.
- If the automatic removal isn’t perfect, use the ‘Adjust’ option to refine the edges around your subject. You can manually add or subtract areas of the background.
- Experiment with the ‘Edge Feather’ and ‘Edge Strength’ settings to smooth out the borders for a more natural look.
- After adjusting, preview the video to ensure the background has been removed to your satisfaction.
Adding a New Background:
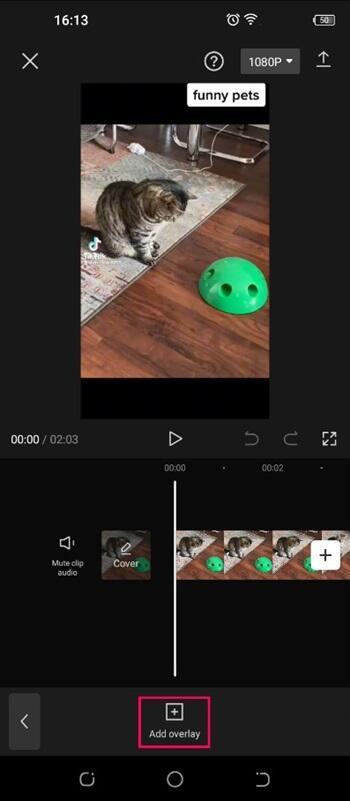
- With the original background removed, you can add a new one by tapping on the ‘Overlay’ option.
- Select a background from your gallery or choose from CapCut’s library.
- Resize and reposition your new background to fit the frame as needed.
Finalizing Your Video:
- Once you are happy with the new background, tap on ‘Apply’ to save the changes.
- Continue editing your video with CapCut’s other tools, or export it if you’re done.
Troubleshooting Common Issues:
- Imperfect Edges: If the subject’s edges aren’t clear, try adjusting the lighting and contrast settings in your video and reapply the background remover.
- App Crashes or Freezes: Ensure your CapCut app is updated. If problems persist, try restarting the app or your device.
- Quality Loss: To maintain quality, avoid over-adjusting the edge settings and use high-resolution backgrounds.
By following these steps, you can effectively remove and replace backgrounds in your videos using CapCut. This tool unlocks a new dimension of creativity, allowing you to set your subjects in any scene you can imagine.
Creative Tips and Tricks for Background Removal
After successfully removing the background from your video in CapCut, the creative possibilities become virtually limitless. Here are some inventive ideas and practical advice to further enhance your video:
- Creating Dynamic Backgrounds: Instead of using static images, try incorporating dynamic backgrounds like moving landscapes or bustling cityscapes. This adds an element of depth and realism to your video.
- Play with Colors and Effects: Experiment with different color schemes or apply filters to your new background for artistic flair. Adjusting the hue, saturation, or brightness can dramatically change the mood of your video.
- Introduce Text and Graphics: Utilize CapCut’s text and sticker options to add engaging elements to your video. This can be particularly effective for creating eye-catching social media content or informative presentations.
- Layer with Music and Sound Effects: The right background music or sound effects can significantly enhance the impact of your video. Choose tracks that complement the new setting you’ve created.
Combining background removal with other CapCut features opens up a world of creative editing:
- Utilize Animation and Transitions: With the background removed, animating your subject or using creative transitions can make your video more dynamic. Experiment with CapCut’s wide range of transition effects.
- Blend Multiple Clips: Try using the background removal feature on multiple clips and blend them together. This technique can be used to create intriguing collages or narrative sequences.
- Sync with Beats and Rhythms: CapCut allows you to sync your video edits with the beats of a background track. This can create a compelling and rhythmic visual experience, especially after removing and replacing the background.
Remember, the key to mastering CapCut’s background removal tool is experimentation. Each video is a canvas, and with these tips, you can paint an array of scenes limited only by your imagination.
Conclusion: Unleashing Your Creativity with CapCut
In conclusion, CapCut offers a world of creative possibilities, especially with its proficient background removal tool. We’ve journeyed through the essential steps to prepare your video, delved into the intricacies of removing and replacing backgrounds, and explored innovative ways to enhance your projects post-editing. The process, starting from selecting the right video, setting up CapCut, to the detailed steps of background removal, and creative post-editing techniques, highlights the app’s versatility and user-friendliness.
The true essence of CapCut lies in its ability to democratize video editing, making advanced features accessible to everyone. As you continue to use CapCut, remember that experimentation is key. Each video is a canvas for your imagination, and the background removal tool is just one of the many brushes at your disposal. Be bold in your creative choices, blend different features, and see how your videos can tell compelling stories, evoke emotions, or simply entertain.
So, embrace this journey of creative exploration with CapCut. Push the boundaries, experiment with new ideas, and watch as your video editing skills flourish. Your next masterpiece is just an edit away!