Contents
Introduction to iPhone Screen Recording
In an era where digital content is king, the ability to capture and share moments directly from your iPhone screen has become invaluable. Whether you’re a content creator looking to craft engaging tutorials, a gamer eager to showcase your latest high score, or someone who simply wants to save precious memories from video calls, screen recording on your iPhone is a feature that opens a world of possibilities. This functionality, embedded within the sleek design of Apple’s iOS, is not just about recording — it’s about immortalizing moments, sharing knowledge, and keeping memories alive. As we delve into the intricacies of this feature, you’ll discover how effortlessly you can record your iPhone screen, turning everyday actions into digital legacies.
Getting Started with Screen Recording on Your iPhone
Embarking on your screen recording journey on the iPhone begins with setting up access to this feature. Follow these steps to seamlessly integrate screen recording into your iPhone’s Control Center for quick and easy use:
Accessing the Control Center:
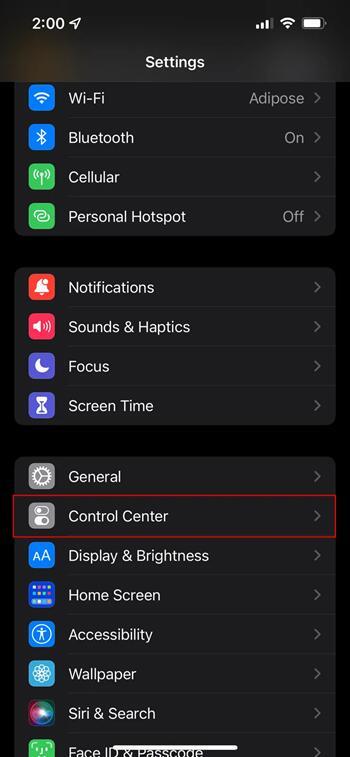
- Open the ‘Settings’ app on your iPhone.
- Scroll down and tap on ‘Control Center’. This section allows you to customize the controls that appear in the Control Center, making them accessible with just a swipe.
Adding Screen Recording to Control Center:
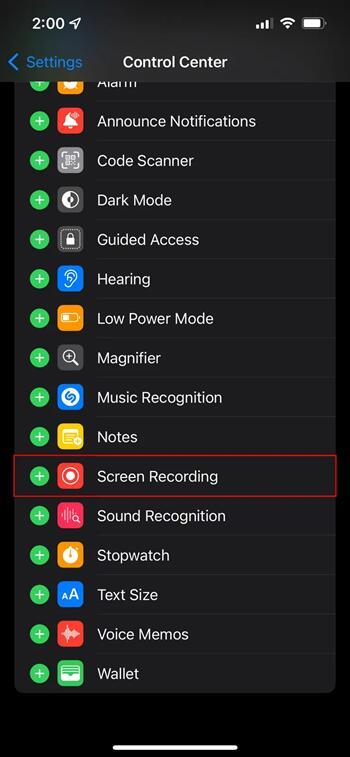
- In the Control Center settings, look for the ‘More Controls’ section.
- Find ‘Screen Recording’ in the list and tap the green plus icon next to it. This action moves it to the ‘Include’ list, signifying that it will now appear in your Control Center.
- Once added, you can access the screen recording feature by swiping down from the top-right corner of the screen (on iPhone X or later) or swiping up from the bottom edge of the screen (on earlier models).
With these simple steps, the power to record your iPhone screen is now just a swipe and a tap away. Whether you’re prepping for a quick tutorial or gearing up to record epic gameplay, setting up access to screen recording is your first step to capturing it all.
Recording Your iPhone Screen: A Step-by-Step Process
Now that you have the screen recording feature set up in your Control Center, it’s time to dive into the actual recording process. Here’s how you can seamlessly start, manage, and conclude your screen recordings on the iPhone:
Initiating the Screen Recording:
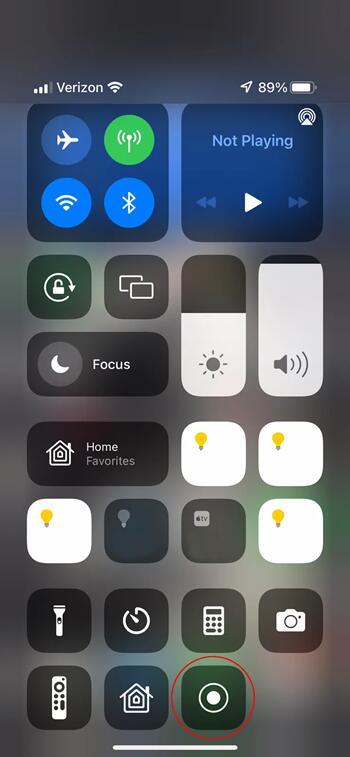
- Swipe to access the Control Center.
- Tap the screen recording icon, which resembles a solid circle inside a ring.
- There’s a 3-second countdown before the recording starts, giving you a brief moment to prepare.
- The status bar or time indicator will turn red, signaling that the recording is ongoing.
Managing Your Recording:
Pausing and Resuming:
- To pause the recording, simply tap the red status bar at the top of your screen, then select ‘Stop’.
- To resume, go back to the Control Center and tap the screen recording icon again.
Incorporating Audio:
- If you wish to include external audio, deeply press or long-press the screen recording icon in the Control Center and tap the microphone audio to turn it on.
Ending the Recording:
- Stop the recording by tapping the red status bar and selecting ‘Stop’.
- Alternatively, you can also stop the recording from the Control Center.
- Once stopped, the recording will be automatically saved to your Photos app.
This straightforward process allows you to capture exactly what you need from your iPhone screen. Whether it’s a step-by-step tutorial, a memorable video call, or an exciting gaming session, mastering these steps ensures that you won’t miss a thing.
Tips and Tricks for Effective Screen Recording
To elevate your screen recording experience on the iPhone, it’s not just about hitting record and stop. There are nuances that can significantly enhance the quality and smoothness of your recordings. Here are some pro tips to help you achieve the best results:
- Utilize ‘Do Not Disturb’ Mode: Activating ‘Do Not Disturb’ mode before starting your recording can be a game-changer. It prevents unexpected calls or notifications from interrupting your recording session. Simply swipe into your Control Center and tap the crescent moon icon to activate it.
- Optimize Recording Settings: Dive into the Settings app and explore the Screen Recording options. Here, you can adjust the video quality and frame rate, ensuring your recording is crisp and fluid, especially for fast-paced content like games.
- Clear the Stage: Before recording, take a moment to declutter your screen. Remove unnecessary icons from your status bar and close irrelevant apps running in the background. This helps in focusing the viewer’s attention on the important content.
- Leverage External Audio: If you’re narrating or want to include ambient sounds in your recording, ensure your environment is quiet. Consider using an external microphone for clearer audio quality, making your recordings more professional.
- Plan Your Moves: Especially for tutorials, plan your actions on screen. A smooth flow of movements and transitions makes your content more engaging and easier to follow for your audience.
By incorporating these tips, your iPhone screen recordings will not only capture the content but also convey it in a more polished, viewer-friendly manner.

Common Issues and Troubleshooting
Even with the best preparations, users may occasionally encounter issues while screen recording on their iPhones. Here’s a quick guide to some common problems and their solutions:
Problem: Screen Recording Not Starting
- Solution: Ensure screen recording is correctly added to the Control Center. Restart your iPhone if the issue persists.
Problem: No Sound in the Recording
- Solution: Check if the microphone audio is turned on in the screen recording settings. Also, verify that your device is not in silent mode.
Problem: Recording Stops Unexpectedly
- Solution: This often occurs due to insufficient storage space. Free up space by deleting unnecessary files or uploading media to cloud storage.
Problem: Poor Video Quality
- Solution: Check your screen recording settings for video quality options. Avoid recording high-motion content if your device has limited processing power.
Problem: Recording is Too Long or Large
- Solution: Plan your recording to capture only necessary content. Utilize video editing tools to trim and compress the recording if needed.
By understanding these common challenges and their solutions, you can navigate through any hiccups during your screen recording sessions on your iPhone, ensuring a smooth and successful experience.
Conclusion: Maximizing Your iPhone’s Screen Recording Feature
In conclusion, the iPhone’s screen recording feature is a powerful tool that offers immense potential for creativity and functionality. From crafting detailed tutorials to capturing high-stakes gaming moments or preserving precious memories, this feature is versatile and easy to use. By following the step-by-step guide, utilizing the tips for effective recording, and knowing how to troubleshoot common issues, you can fully harness the capabilities of your iPhone’s screen recording. So, delve into this feature, experiment with its possibilities, and elevate your digital content creation to new heights.