Contents
Introduction to Roblox Shirt Creation
Roblox isn’t just a game; it’s a universe of imagination where creativity reigns supreme. At the heart of this vibrant community lies the ability for players to express themselves, and what better way to do so than through custom shirts? These aren’t merely digital garments; they’re canvases for personal expression, symbols of identity in a boundless world. For the uninitiated, Roblox is an expansive online platform where games meet creativity. Here, players don’t just participate in games; they create them. And in this realm of endless possibilities, designing your own shirt is more than a feature—it’s a statement. It’s about bringing your unique style to life, sharing your vision with a global audience, and standing out in a sea of creativity. As we dive into the art of shirt creation in Roblox, prepare to embark on a journey of artistic exploration, where your imagination is the only limit.
Understanding the Basics of Roblox Shirt Design
Embarking on your Roblox shirt design journey begins with understanding the essentials. Crafting that perfect shirt isn’t just about creativity; it involves a blend of the right tools and a basic understanding of how Roblox’s design system works. Here are the fundamental elements you’ll need to get started:
- Roblox Studio: This is your primary design workspace. Roblox Studio is the official development environment for Roblox games and assets. It’s where you’ll upload and test your shirt designs.
- Image Editing Software: Your designs start here. Programs like Adobe Photoshop, GIMP, or even simpler tools like Microsoft Paint can be used to create your shirt’s initial design. These tools allow for intricate designs with layers, custom colors, and textures.
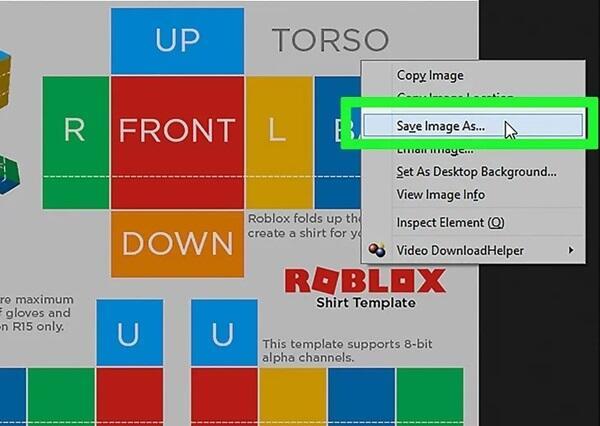
- Template Understanding: Roblox requires shirts to be uploaded using a specific template. This template ensures that your design aligns correctly on the avatar’s body. Familiarize yourself with the template layout to understand where to place designs for the front, back, and sleeves of the shirt.
- File Format Knowledge: Roblox accepts shirt designs in either .png or .jpg format. However, .png is preferred for its ability to handle transparency, which is crucial for more complex designs.
- Creative Idea: Before you even open your image editor, have a clear concept or theme for your shirt. Whether it’s a vibrant pattern, a quirky graphic, or a fandom tribute, your idea forms the backbone of your design.
- Roblox Account and Builders Club Membership: To upload and sell your shirts on Roblox, you’ll need an account. Additionally, a subscription to Roblox’s Builders Club is essential to access full design and selling features.
With these tools and knowledge in hand, you’re well on your way to transforming your creative vision into wearable Roblox art. Remember, the key is to blend your artistic flair with these technical requirements for a seamless design experience.
Tools and Software Needed
To create a shirt in Roblox, certain tools and software are indispensable. Each serves a unique purpose in the design process, from conceptualization to the final upload. Here’s a breakdown of what you’ll need:
- Roblox Studio: The cornerstone of your design process. This software allows you to upload and test your shirt designs within the Roblox environment. It’s user-friendly and tailored specifically for Roblox content creation.
- Image Editing Software: Essential for crafting your shirt’s visual elements. Popular choices include Adobe Photoshop for its advanced features and GIMP for a free, yet powerful alternative. These programs offer the flexibility to experiment with different designs, colors, and textures.
- Graphic Design Basics: A fundamental understanding of graphic design principles can elevate your shirt design. Familiarize yourself with concepts like color theory, typography, and layout to create visually appealing shirts.
- Roblox Shirt Template: This template is your guide for sizing and placing your design correctly on the shirt. It outlines the dimensions and areas for the front, back, sleeves, and torso, ensuring your design aligns perfectly with the avatar’s body.
- File Saving Options: Knowledge of file types is crucial. PNG is preferred for its transparency support, allowing for more intricate and detailed designs without a background. JPG can be used but lacks this transparency feature.
Armed with these tools and a bit of creativity, you’re ready to start designing shirts that reflect your unique style and stand out in the Roblox world.
Roblox Account and Membership Details
Before diving into the creative process of shirt design in Roblox, it’s crucial to understand the platform’s account and membership prerequisites. Firstly, a Roblox account is the gateway to everything on the platform, not just shirt design. It’s your personal identifier, a way to interact with the community, and, most importantly, a means to showcase and distribute your creations. Signing up for a Roblox account is straightforward and opens up a universe of gaming and creation opportunities.
However, designing and uploading shirts in Roblox requires more than just a basic account. Enter the Builders Club membership, a premium subscription in Roblox. This membership is a significant step for any aspiring Roblox designer. It grants the ability to create and sell shirts, providing an avenue not only for personal expression but also for potential earnings. Builders Club memberships come in different tiers, offering various benefits and features, but even the most basic level allows for shirt uploads and sales. While it’s an additional step and investment, this membership elevates your Roblox experience, turning a hobby into a potentially rewarding venture.
Understanding these account and membership dynamics is key to fully embracing the creative and entrepreneurial spirit of Roblox. With these in place, your journey from a player to a creator, crafting unique shirts that resonate with the Roblox community, can truly begin.
Designing Your Shirt: A Step-by-Step Guide
Creating a custom shirt in Roblox is an exciting journey that blends creativity with technical skill. Here’s a detailed step-by-step guide to help you navigate from the initial concept to the final upload:
- Conceptualize Your Design: Begin by brainstorming ideas for your shirt. Consider the theme, colors, and any specific graphics or text you want to include. Whether you’re inspired by a favorite game, character, or abstract art, having a clear concept is crucial.
- Gather Your Tools: Ensure you have the necessary software and tools. This typically includes Roblox Studio for uploading and testing, and an image editing program like Photoshop or GIMP for creating your design.
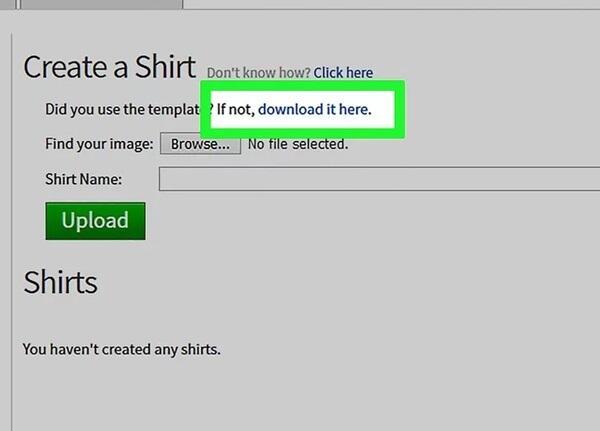
- Download the Roblox Shirt Template: Access the official Roblox shirt template from the Roblox website. This template shows the correct placement and dimensions for shirt designs, ensuring your creation fits perfectly on a Roblox avatar.
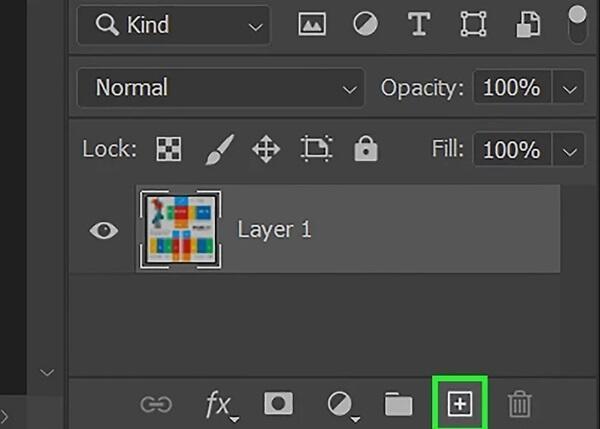
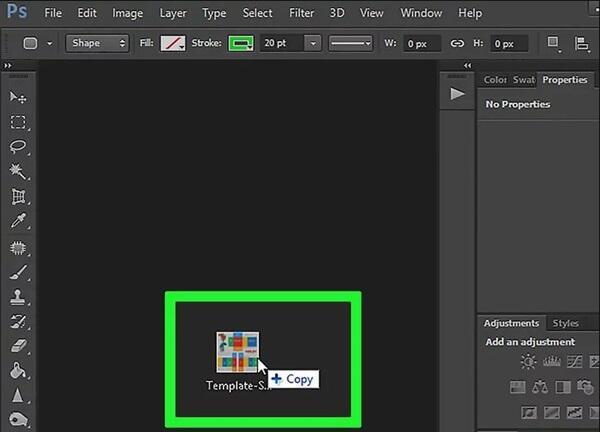
- Create Your Design: Open your chosen image editing software and import the Roblox shirt template. Start designing by adding your chosen colors, patterns, and graphics. Pay attention to how the design aligns with different parts of the shirt, like the sleeves and torso.
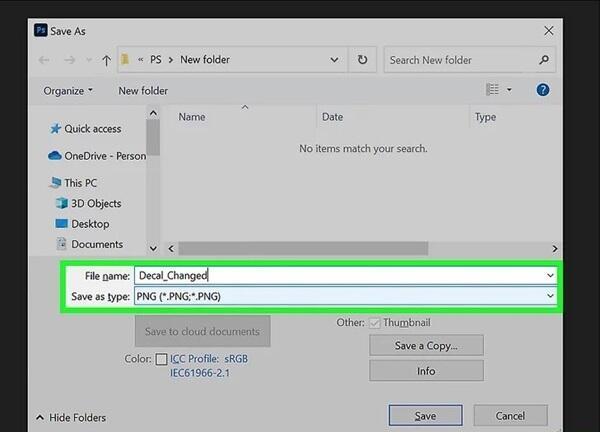
- Save Your Design: Once satisfied with your design, save it in a PNG format for optimal quality. PNG supports transparency, allowing for more intricate and detailed designs.
- Upload Your Shirt to Roblox Studio: Launch Roblox Studio and log in to your account with a Builders Club membership. Navigate to the ‘My Creations’ tab, select ‘Shirts’, and click on ‘Create’.
- Test Your Shirt: Before making your shirt available to others, test it on your avatar to ensure it looks as expected. Make any necessary adjustments to the design if needed.
- Set a Price and Publish: Decide on the price for your shirt if you plan to sell it. Once you’re happy with the design and price, click the ‘Upload’ button to publish it on Roblox.
- Promote Your Shirt: Share your creation on social media, Roblox groups, or with friends to get your design noticed and potentially increase sales.
By following these steps, you can transform your creative ideas into a wearable piece of art in Roblox. Each step is an opportunity to unleash your creativity and make something truly unique for the Roblox community to enjoy.
Creating Your Design
Designing a shirt for Roblox is an art that combines creativity with strategy. Here are some tips and tricks to help you create an engaging and unique design:
- Choose a Color Scheme Wisely: Colors can set the mood and style of your shirt. Use complementary colors for harmony, or contrasting colors for a bold statement. Tools like Adobe Color can help you pick a perfect palette.
- Incorporate Themes: Align your design with popular themes in Roblox, such as adventure, fantasy, or sci-fi. Or, tap into current trends, holidays, or seasons for timely relevance.
- Pay Attention to Detail: Small details can make a big difference. Add texture effects, shadows, or subtle patterns to give depth to your design.
- Balance Complexity and Simplicity: While intricate designs can be eye-catching, overly complex patterns might not translate well on a small avatar. Aim for a balance where your design is interesting but not cluttered.
- Font and Typography: If your design includes text, select fonts that complement the overall style. Ensure the text is legible and well-placed.
- Test Your Design: View your design on the Roblox avatar model to see how it looks in different poses. This helps in adjusting the placement and scale of design elements.
- Be Original: While inspiration is great, strive for originality. Unique designs stand out more in the Roblox community and showcase your personal touch.
- Feedback and Iteration: Don’t hesitate to seek feedback from friends or fellow Roblox players. Use their input to refine and improve your design.
By keeping these tips in mind, you can create a shirt in Roblox that is not only visually appealing but also resonates with your personal style and the tastes of the community.
Uploading and Publishing on Roblox
After creating your unique shirt design, the next crucial step is to upload and publish it on Roblox. Here’s a straightforward guide to help you through this process:
- Finalize Your Design: Ensure your shirt design is complete and saved in the correct format. Roblox accepts PNG for its transparency support, which is vital for intricate designs.
- Log Into Roblox Studio: Open Roblox Studio and sign in with your Roblox account. You need to have a Builders Club membership to upload shirts.
- Navigate to the Shirt Upload Section: In Roblox Studio, go to the ‘My Creations’ tab, then select ‘Shirts’ from the list. Here, you’ll find the option to upload your new design.
- Upload Your Shirt Design: Click on the ‘Choose File’ button to browse and select your shirt design file. Ensure the file matches the Roblox template in dimensions and format.
- Name Your Shirt: Give your shirt a unique and catchy name. This name will appear in the Roblox catalog and should reflect the essence of your design.
- Set a Price: Decide if you want to sell your shirt. If so, set a price. Remember, you’ll earn a percentage of sales, so price it wisely to attract buyers.
- Submit for Approval: Once you’ve completed all steps, submit your shirt for approval by clicking the ‘Upload’ button. Roblox will review the design to ensure it meets community standards.
- Wait for Approval: Approval times can vary. Once approved, your shirt will be available in the Roblox catalog, and you can also equip it on your avatar.
- Promote Your Shirt: Share your creation on social media or within Roblox communities to gain visibility and increase potential sales.
Following these steps will ensure a smooth experience in bringing your creative vision to the Roblox community, letting players across the globe showcase your design.

Roblox on Android: A Specific Look
When it comes to creating and uploading shirts in Roblox, using an Android device introduces some unique considerations, especially with the APK version of the game. The process differs slightly from the standard PC-based creation, but with the right approach, it can be just as effective.
Firstly, it’s important to note that the core design process remains the same. You’ll still use image editing software to create your shirt design. However, on Android, you might opt for mobile-friendly graphic design apps like Adobe Spark Post or Canva, which offer great flexibility and are convenient for on-the-go design work. These apps can help you craft your shirt’s visual elements directly from your Android device.
The significant difference lies in the uploading process. The Roblox mobile app, including the APK version, doesn’t support direct shirt uploads. Therefore, you’ll need to transfer your finished shirt design from your Android device to a PC. This can be done via cloud storage services like Google Drive or Dropbox, or through a direct USB connection. Once the file is on your PC, follow the standard Roblox Studio upload procedure.
Furthermore, when designing on Android, consider the screen size and resolution. Designs created on smaller screens should be checked on a larger display to ensure details are visible and the overall look is as intended. Also, be mindful of file formats and sizes, as some mobile apps might save images in formats other than PNG, which is preferred for Roblox shirt designs.
Lastly, if you’re using an APK version of Roblox, ensure it’s updated to the latest version. This is crucial for compatibility, especially when transferring files or accessing various features from the mobile app to the PC.
In summary, while Android devices offer a more mobile and accessible way to design Roblox shirts, they require a few extra steps to ensure a smooth transition from design to upload. By understanding and adapting to these nuances, you can effectively create and share your shirt designs within the Roblox community, regardless of your device.
Common Mistakes and Troubleshooting
Creating shirts in Roblox can sometimes be a challenging process, especially for beginners. Understanding common mistakes and knowing how to troubleshoot them can greatly enhance your shirt-making experience. Here are some typical issues and their solutions:
Incorrect Template Usage: One of the most common errors is not using or aligning the shirt template correctly. This can result in designs that don’t fit properly on the avatar.
- Solution: Always use the official Roblox shirt template. Pay close attention to the guidelines for each section of the shirt, ensuring your design is placed accurately.
File Format and Size Errors: Uploading a file in an incorrect format or size can lead to rejection.
- Solution: Ensure your design is saved as a PNG for transparency handling. Also, adhere to Roblox’s size specifications for shirt images.
Design Not Appearing in Catalog: Sometimes, after uploading, your design might not appear in the Roblox catalog immediately.
- Solution: This is often a delay issue. Wait for some time as it might take a while for new uploads to be processed and appear in the catalog.
Transparency Issues: Parts of the shirt that are supposed to be transparent appearing as solid colors.
- Solution: Double-check that your image editing software is set to support transparency and that you’re saving the file in a format that preserves it (PNG).
Color Mismatch: The colors in the Roblox environment may look different from what you designed.
- Solution: Adjust your monitor’s color settings or test your design under different lighting conditions in Roblox Studio to ensure color accuracy.
Design Rejection for Policy Violation: Designs that violate Roblox’s community standards can be rejected.
- Solution: Familiarize yourself with Roblox’s content guidelines. Avoid using copyrighted material, explicit content, or offensive symbols in your designs.
By being aware of these common mistakes and knowing how to fix them, you can streamline your shirt creation process and enjoy a more successful design experience on Roblox.
Conclusion and Encouragement for Aspiring Designers
As we wrap up this guide on creating shirts in Roblox, it’s important to remember that the journey of design is as rewarding as the destination. Each shirt you create is a reflection of your unique style, a piece of art that can inspire and delight fellow players in the Roblox community. Don’t be afraid to experiment with your designs. Push the boundaries of your creativity, play with different themes, colors, and patterns. The beauty of Roblox is its embracing of diversity and creativity, providing a platform where your imagination can soar without limits.
Remember, every great designer started with a single idea, a blank canvas, and the courage to create. Your designs might not only become popular in the community but also could inspire others to start their creative journey. So, keep designing, keep experimenting, and most importantly, have fun with it. The world of Roblox is vast and varied, and there’s always room for new ideas and fresh creativity. Who knows, your next shirt design might just be the next big trend in Roblox!